Getting started with Amazon's EC2 - 10 May 2015
When we need a server to deploy some application there are several alternatives, among the traditional ones are:
- Shared Hosting is a service where a provider has a server and install software that allows for multiple clients to run web sites.
- Upsides cheap, almost no setup needed, less maintenance needed.
- Downsides low performance, low control, not much flexibility.
- Dedicated Server this is an actual server that the provider installs and lends to you.
- Upsides potentially better performance, very flexible, almost total control, hard to scale.
- Downsides costly, much setup and maintenance needed (unless you purchase a maintenance service that is generally very costly).
- Virtual Private Server this is basically the same as a dedicated server, but you get access to a Virtual Machine instead of real hardware. Usually, a single server holds several Virtual Machines.
- Upsides mid-performance between shared and dedicated, very flexible, total control, easy to scale.
- Downsides costly if you wish to scale, much setup and maintenance needed (unless you purchase a maintenance service).
Everything as a Service
Recently, more and more companies are offering their services for a pay as you go and on demand way. In other words, instead of selling a software license for a downloadable and/or installable system, they offer the same features hosted in their servers with a low entry fee (monthly, hourly or any other frequency).
These services vary in what they offer and how they do it, but, overall, they can be classified in:
-
SaaS or Software as a Service are those services that provide a software running “somewhere in the cloud” and which you don’t even have to deploy. Gmail, Dropbox, Google Docs and many other services we use every day are SaaS.
-
PaaS or Platform as a Service are those services that provide a platform where you can run an application without worrying about server setups and maintenance. A good example of this is Heroku, where you can simply deploy an application and not worry about where it runs, or how the servers are setup.
-
IaaS or Infrastructure as a Service are those services that provide a hardware infrastructure where you can install and configure software applications. A great example of this are Google Compute Engine, Amazon’s EC2, among others.
AWS: Amazon Web Services
Following this trend of Everything as a Service, in 2006 Amazon launched Amazon Web Services, a set of services (both IaaS and PaaS) that aimed to reduce the costs of running applications in the cloud.
Since AWS is charged by usage instead of a fixed monthly fee, it reduces the initial costs of publishing a web application or web site. For less that $10 you can run a linux server for an entire month (check out the prices at https://aws.amazon.com/ec2/pricing/).
EC2: Elastic Compute Cloud
One of the most popular services in AWS is the EC2. In simple words, it provides a way to run Virtual Machines in AWS’s servers without having to worry about hardware setup or maintenance.
Among the best features of this service are:
- Easy deployment using a web interface.
- Easy firewall configuration.
- Easy horizontal scaling by adding more Virtual Machines as needed.
- Easy backup and restore of Virtual Machines.
- Low costs compared to a dedicated server.
- Availability in multiple regions to match your user’s location (US’s east or west coast, Europe).
Overall, EC2 makes it easy to create Virtual Machines for both long running operations like a web application or simply to test out features in a clean server install.
This last feature is specially interesting since it could be used to create Virtual Machines on-demand and run an application’s tests in an isolated environment. Or, simply, to quickly test an application’s installation manual in a clean system.
Creating an EC2 Instance
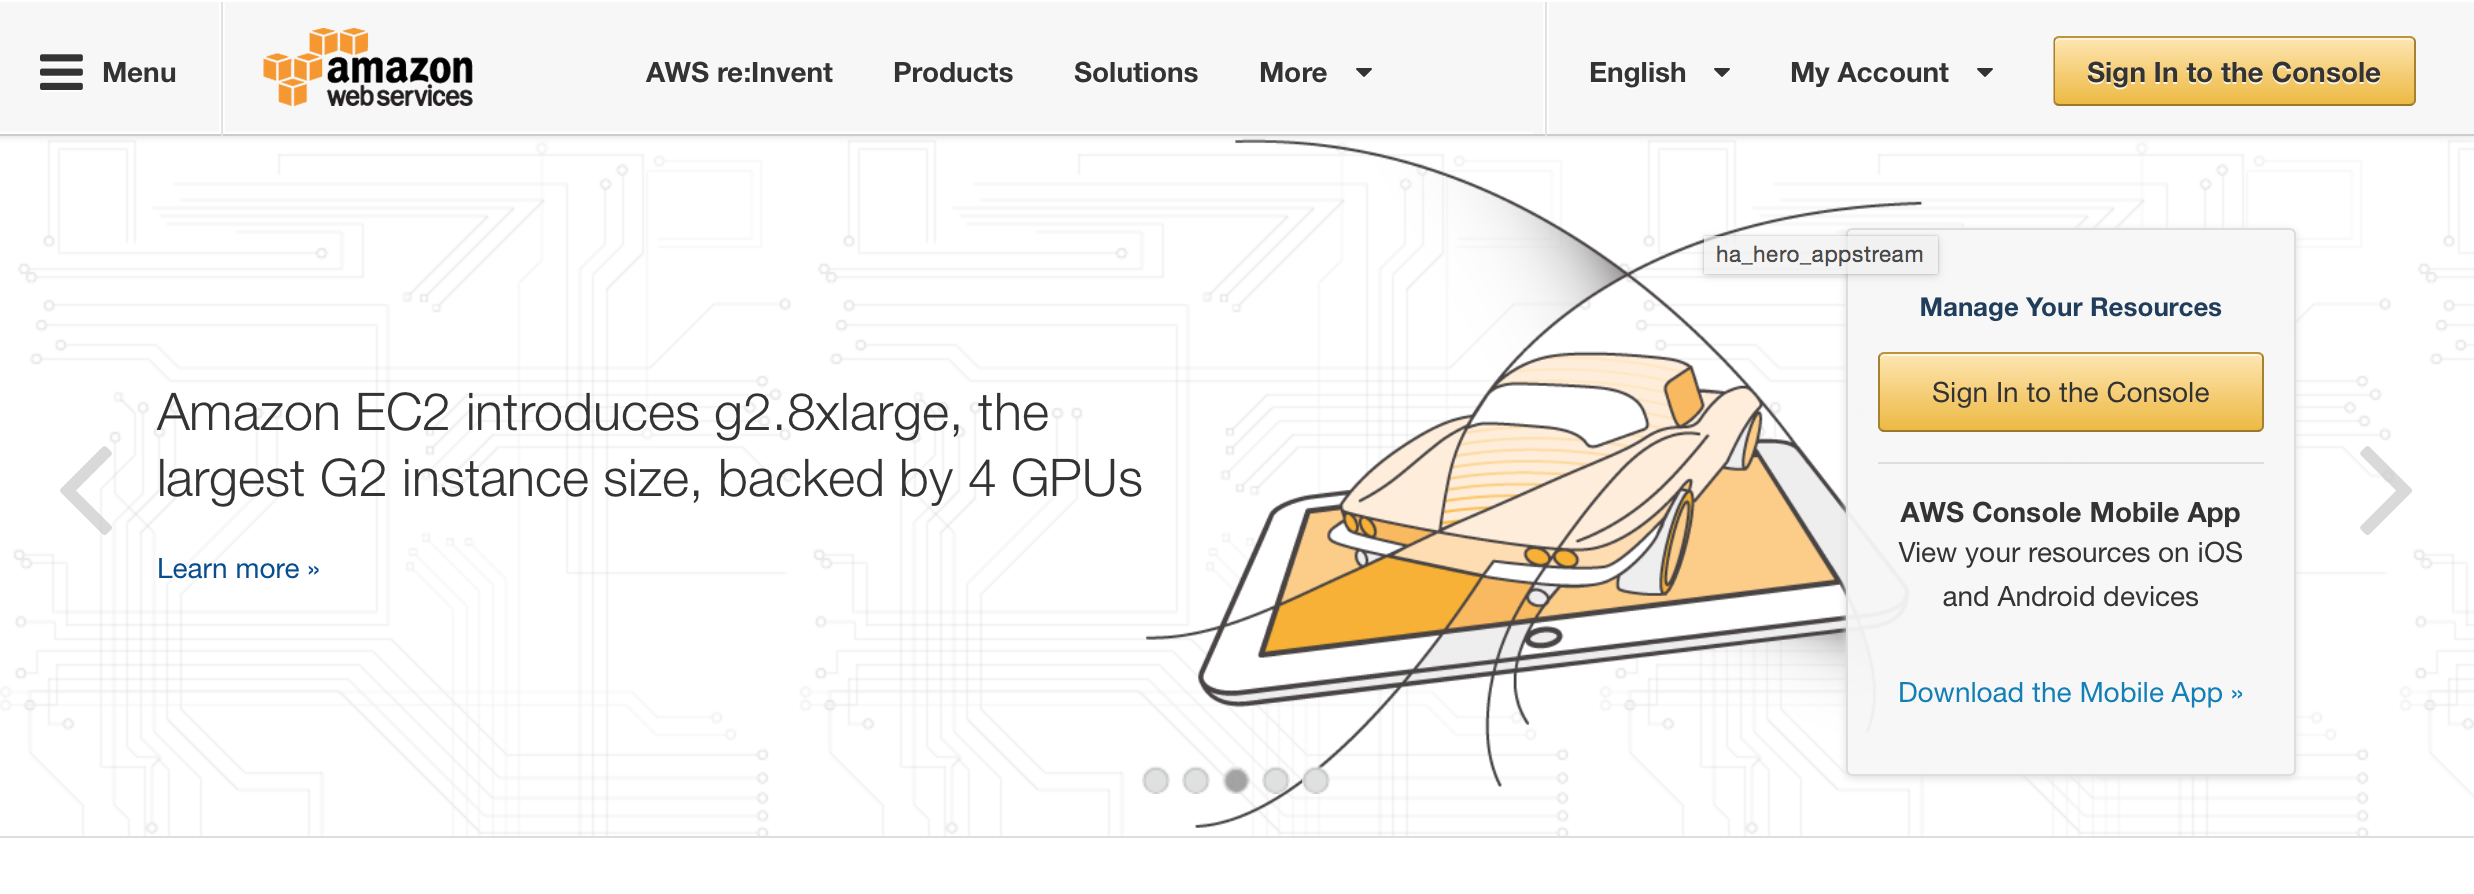
To get started with EC2 we first need to have an Amazon account and sign up for AWS. To do that, we need to go to https://aws.amazon.com and click the Sign In to the Console button at the top right.
Once we have an account, is as simple as signing in with the newly created credentials and opening the EC2 management console by clicking the appropriate icon in the dashboard.
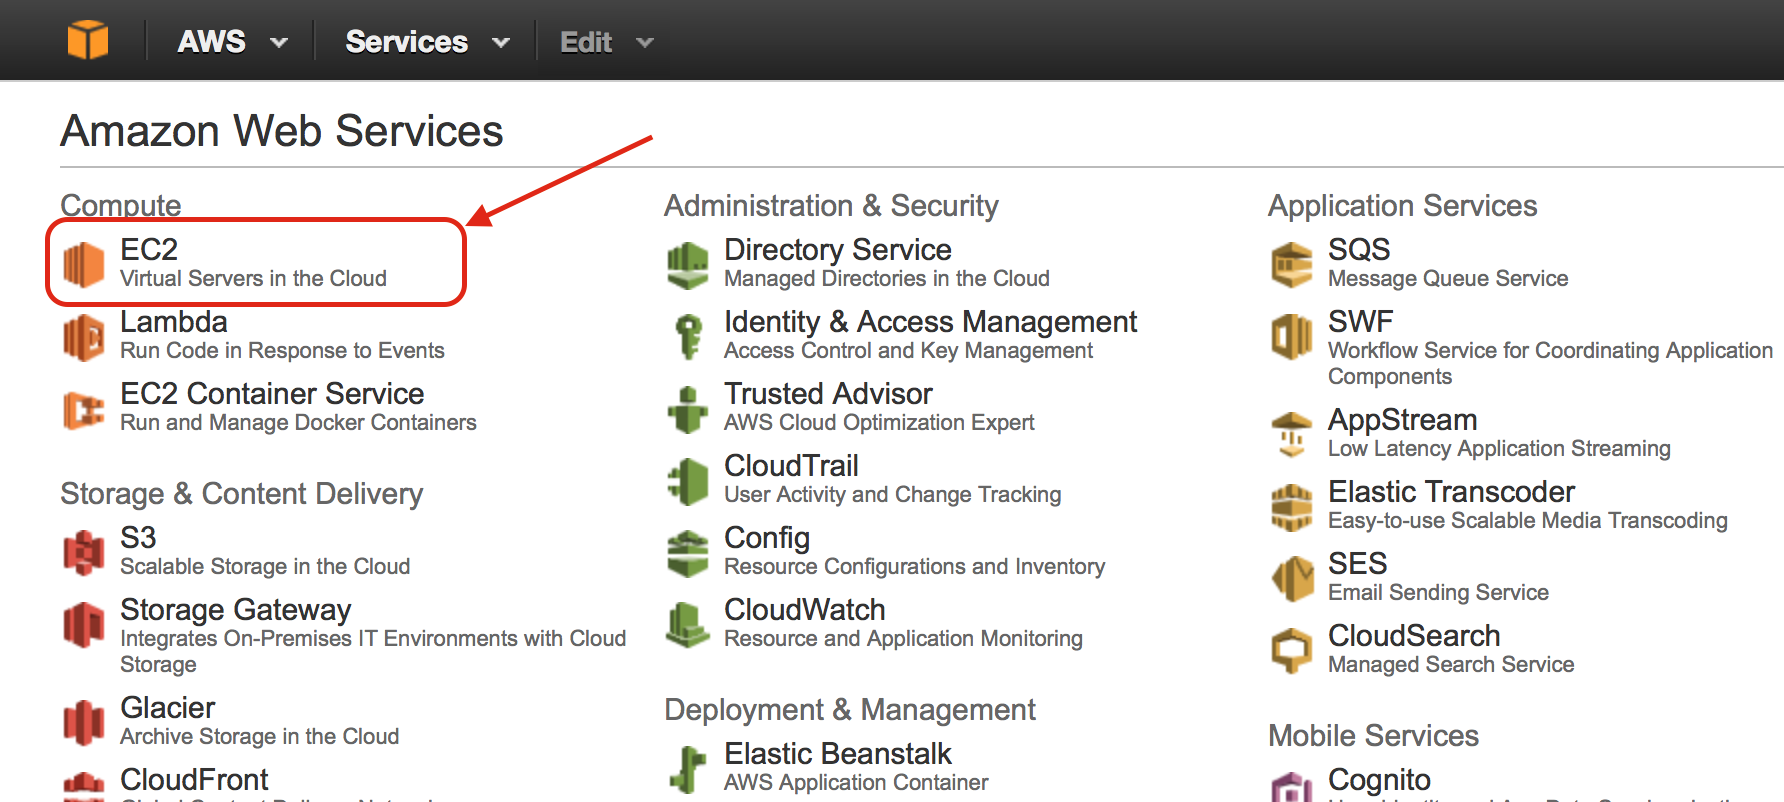
We’ll be presented with the EC2 Dashboard where we can manage our Virtual Machines (or, as EC2 calls them “instances”).
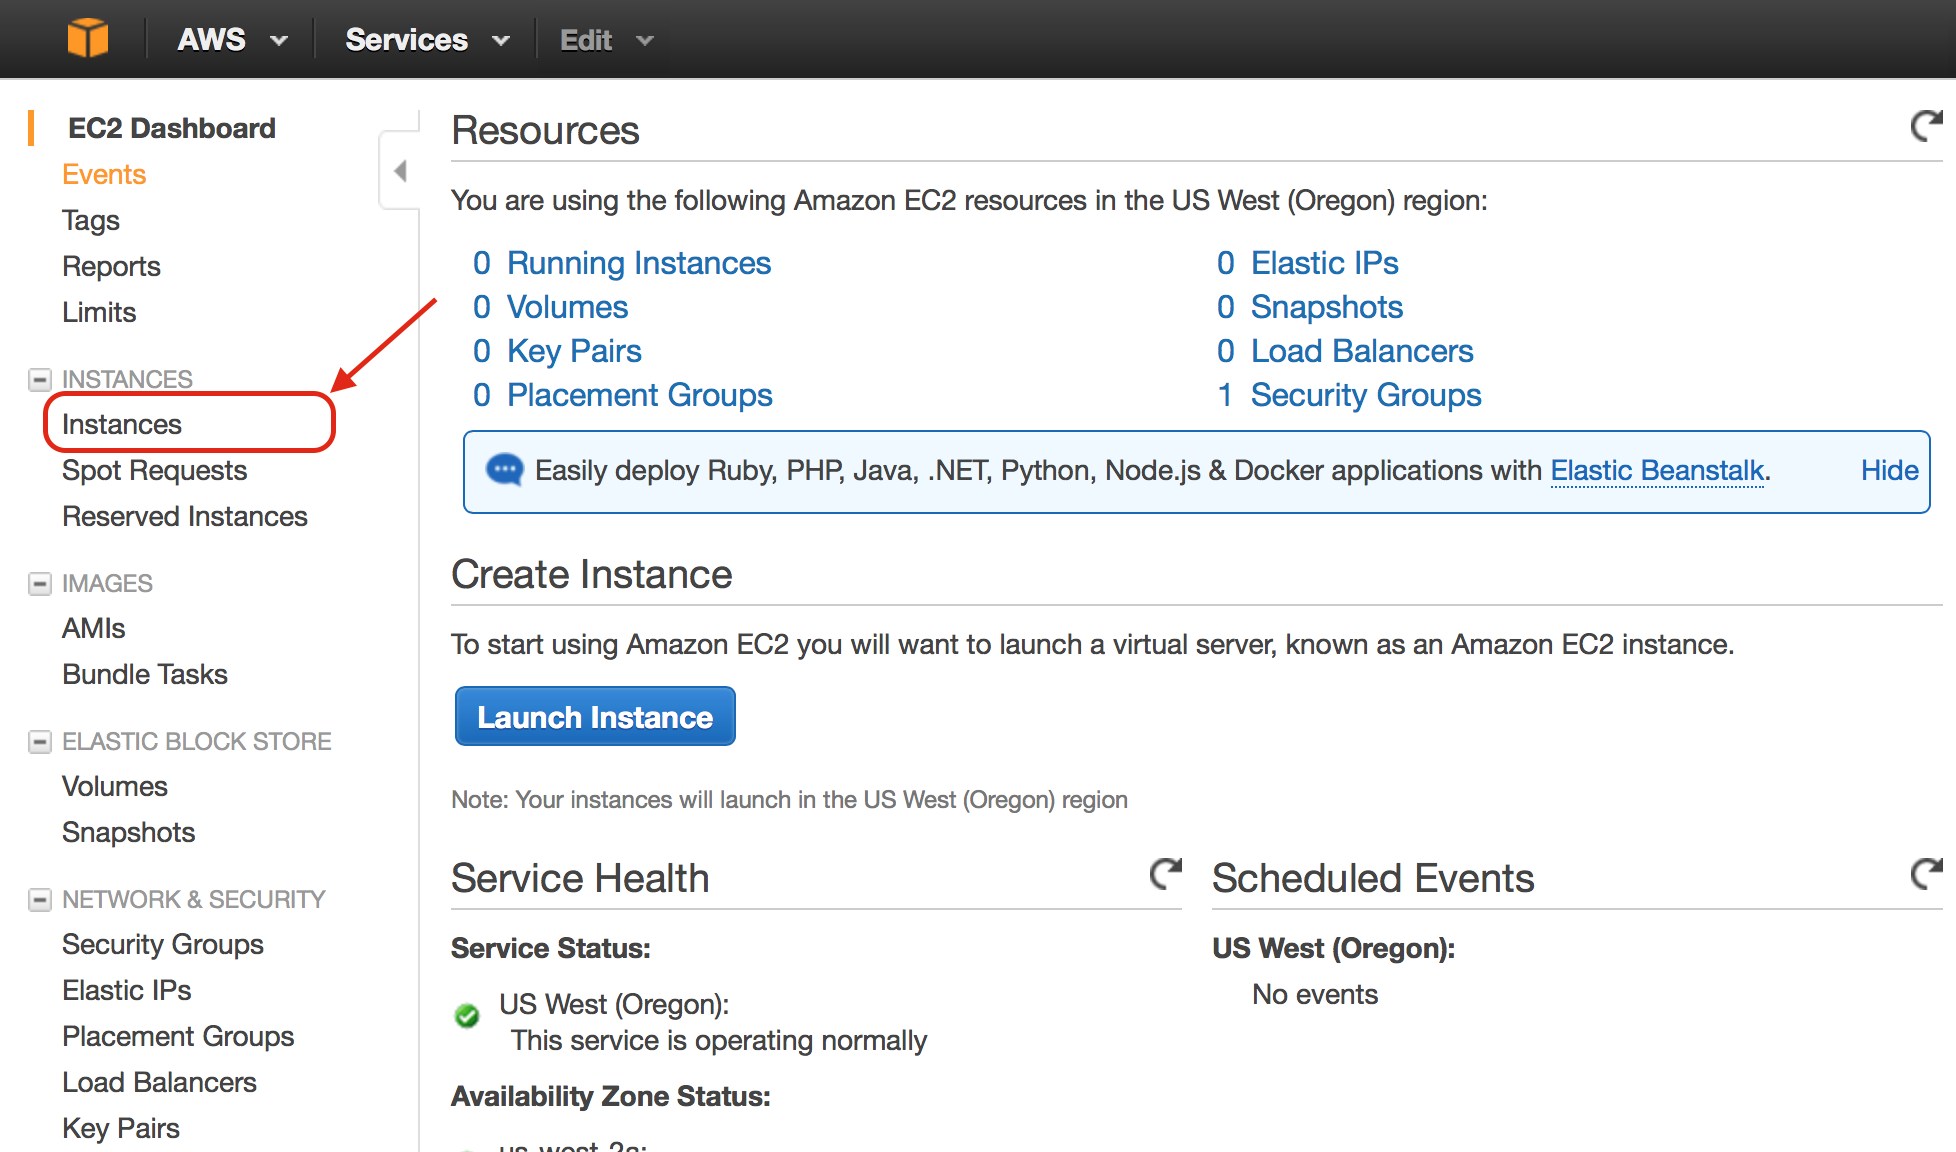
There are so many options in this dashboard that, at the beginning, it can be a overwhelming to find our way around. To create a new instance or manage existing ones, we have to select the Instances option.
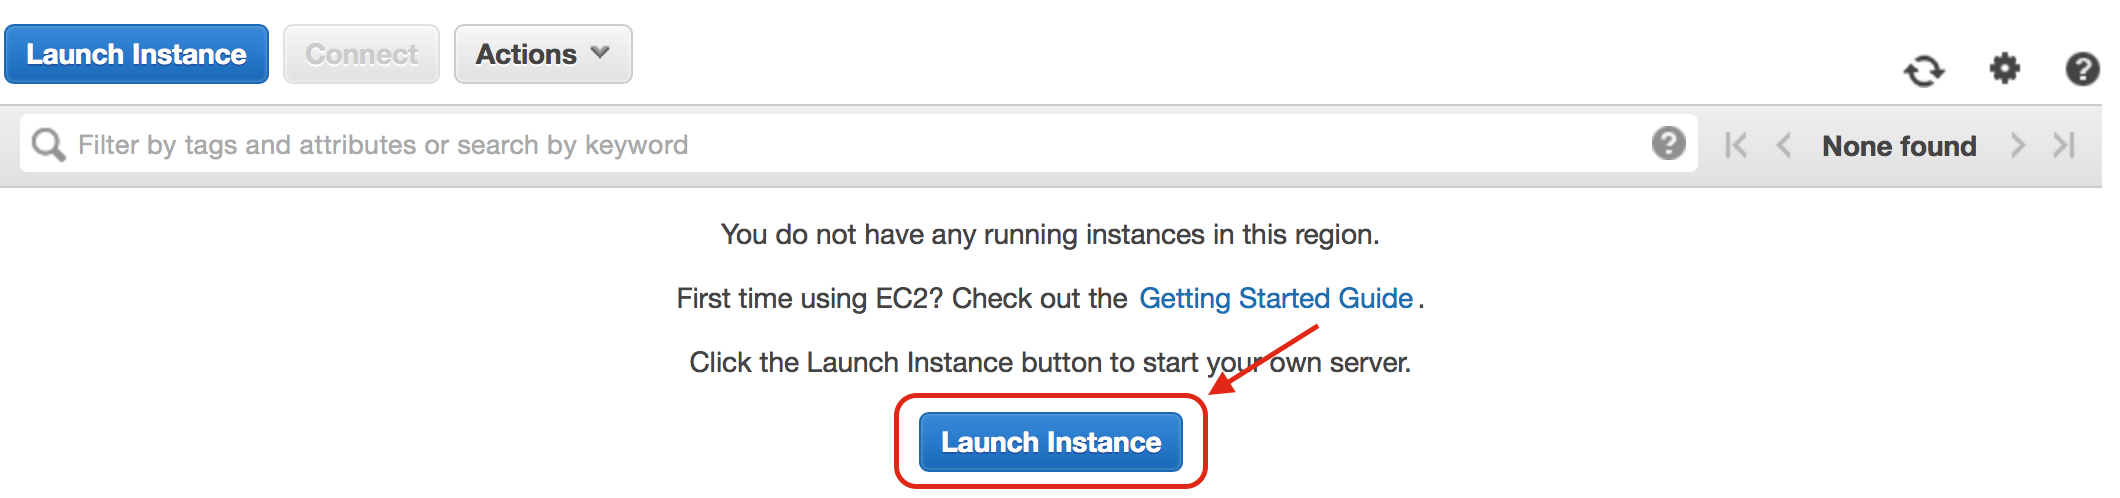
From the instances management console we can click any of the Launch Instance buttons to create a new Virtual Machine.
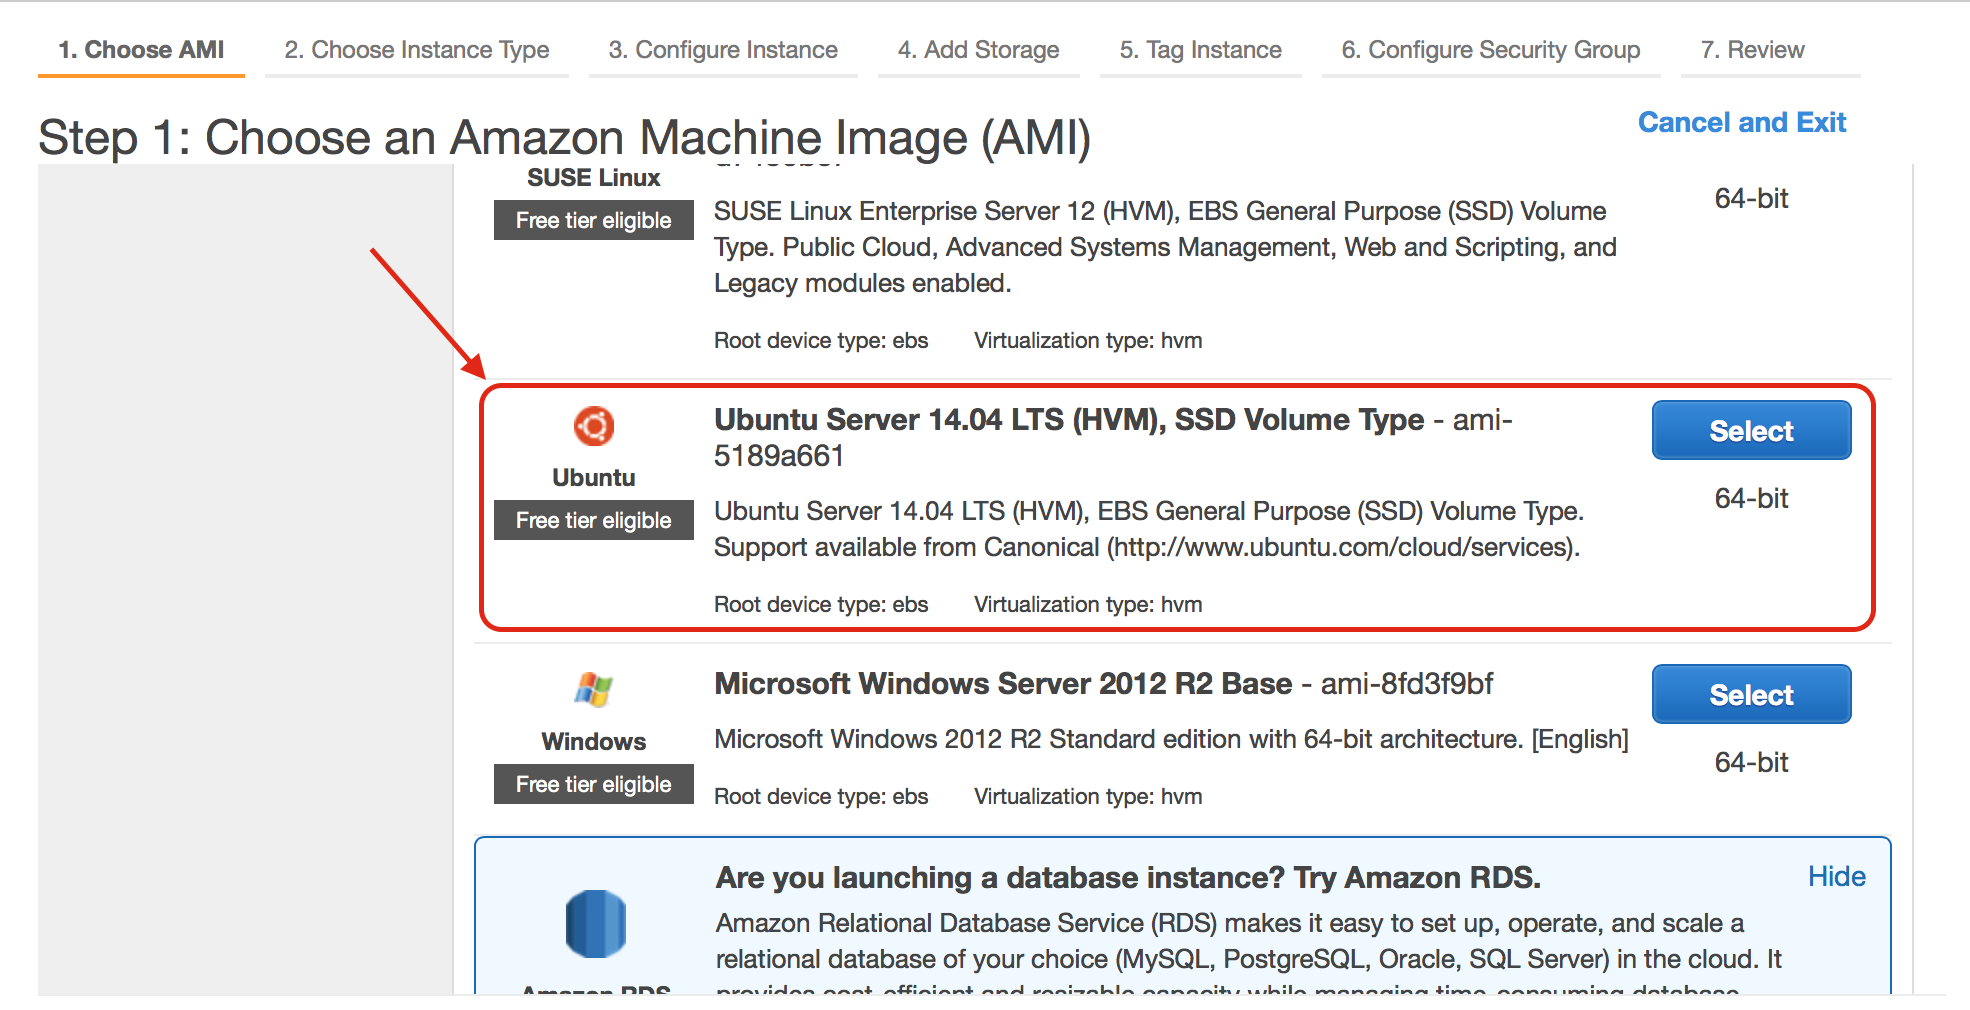
The first thing we need to do when launching an EC2 Instance is choosing an Amazon Machine Image (AMI). These are the different backbone systems we can use to start our server from. It is roughly the same as choosing which operative system / distribution we want to install on our server, the main difference is that this AMIs are pre-installed and are super fast to deploy into our newly created instances.
To begin with, we will choose the latest (at the time of this writing) Ubuntu Server LTS distribution (LTS stands for Long Term Support, a special version that will receive updates for many years) which is Ubuntu 14.04 LTS.
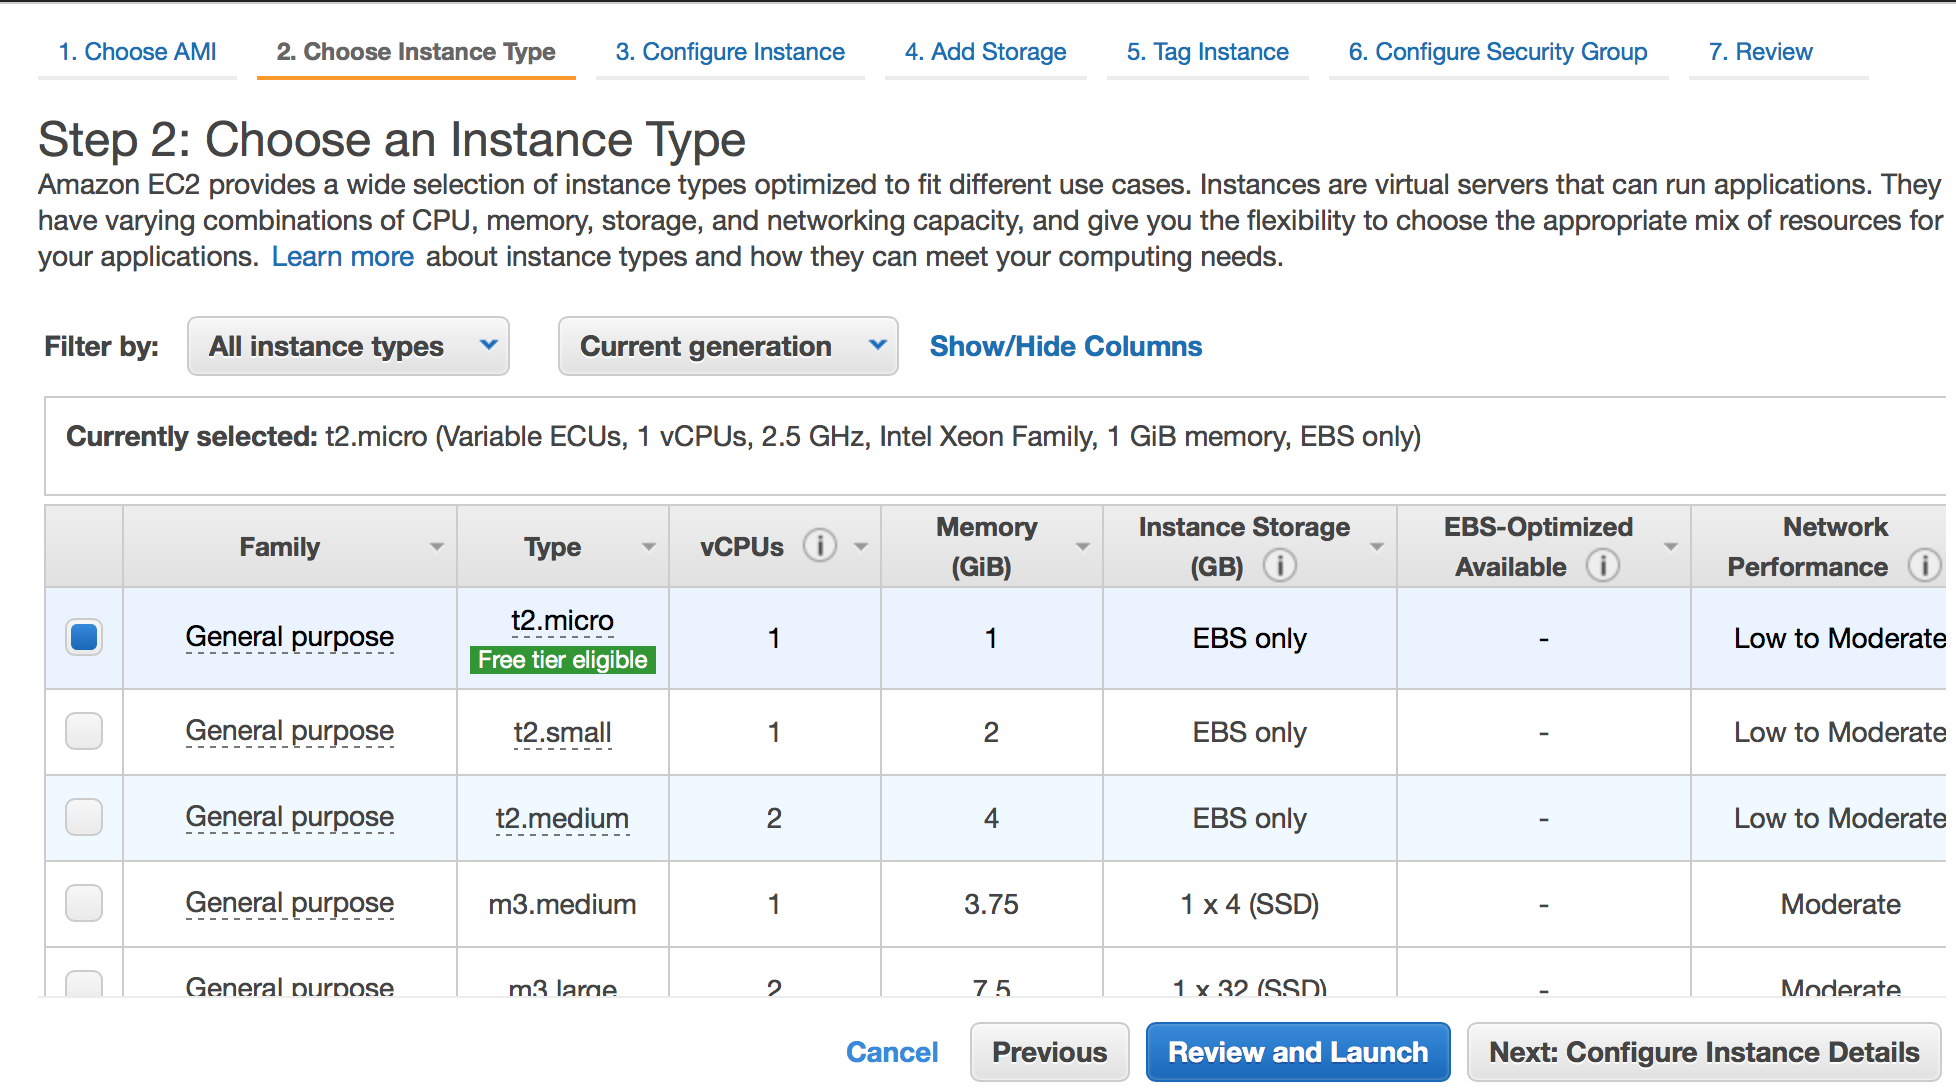
The second step is to choose the instance type, each type has a different amount of available RAM, CPU usage limits (what they call vCPUs), Network Performance and other details (http://aws.amazon.com/ec2/instance-types).
We have to choose one that fits our needs but, for this guide, we will choose the smallest one. This is specially useful for playing with the EC2 Instances since it is elegible for the Free Tier (https://aws.amazon.com/free) which allows us to use a t2.micro instance for free for our first year.
From this, we can either launch the instance with the default configuration or follow the subsequent steps to customize things like:
- Networking you can specify the network where the instance will live and many other things like: subnets, route tables, etc.
- Monitoring there is a product called CloudWatch where you can monitor your instances, view graphs and statistics, among other things.
- Storage you can add additional storage to your instance or change the default settings for the virtual hard drive your server will have assigned.
- Tagging to better organize your instances (some organizations can have hundreds of them) you can add custom tags like: Name, Usage, App Version, or any other you can think of.
- Security Group which is, in essence, the firewall configuration (which ports are reachable from the outside).
When you are ready to create your instance, click the Review and Launch button or just cycle through the wizard steps until the last one.
Before creating the instance, you get a chance to Review all the configurations that are going to be applied to the new Virtual Machine. Now it’s your time to change anything like: instance type, storage, which are examples of things that are a bit harder to change once it gets created.
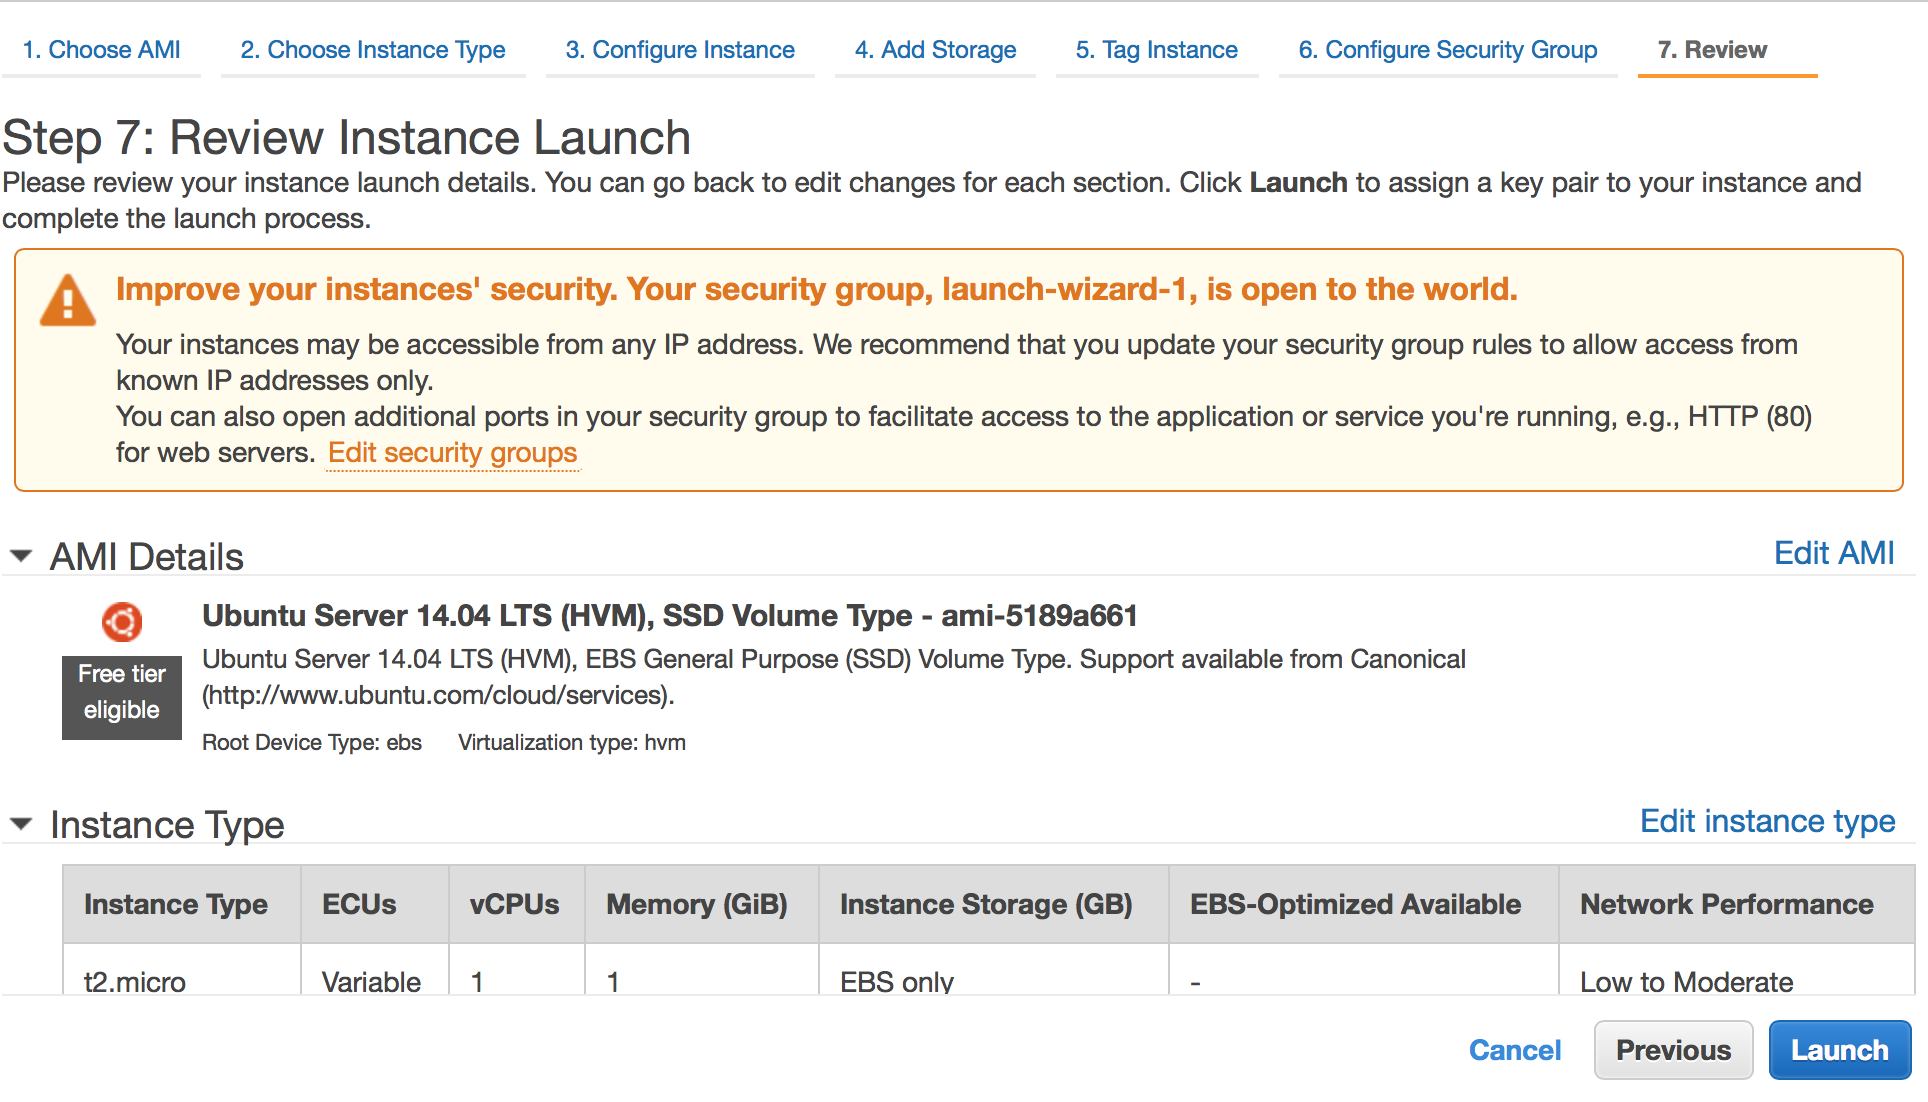
Once we decide we like the configuration, we can click the Launch button to start the creation of our brand new linux server. But, before we can actually start messing around with apt-get and other Debian commands, there is one last step: setting up our keypair.
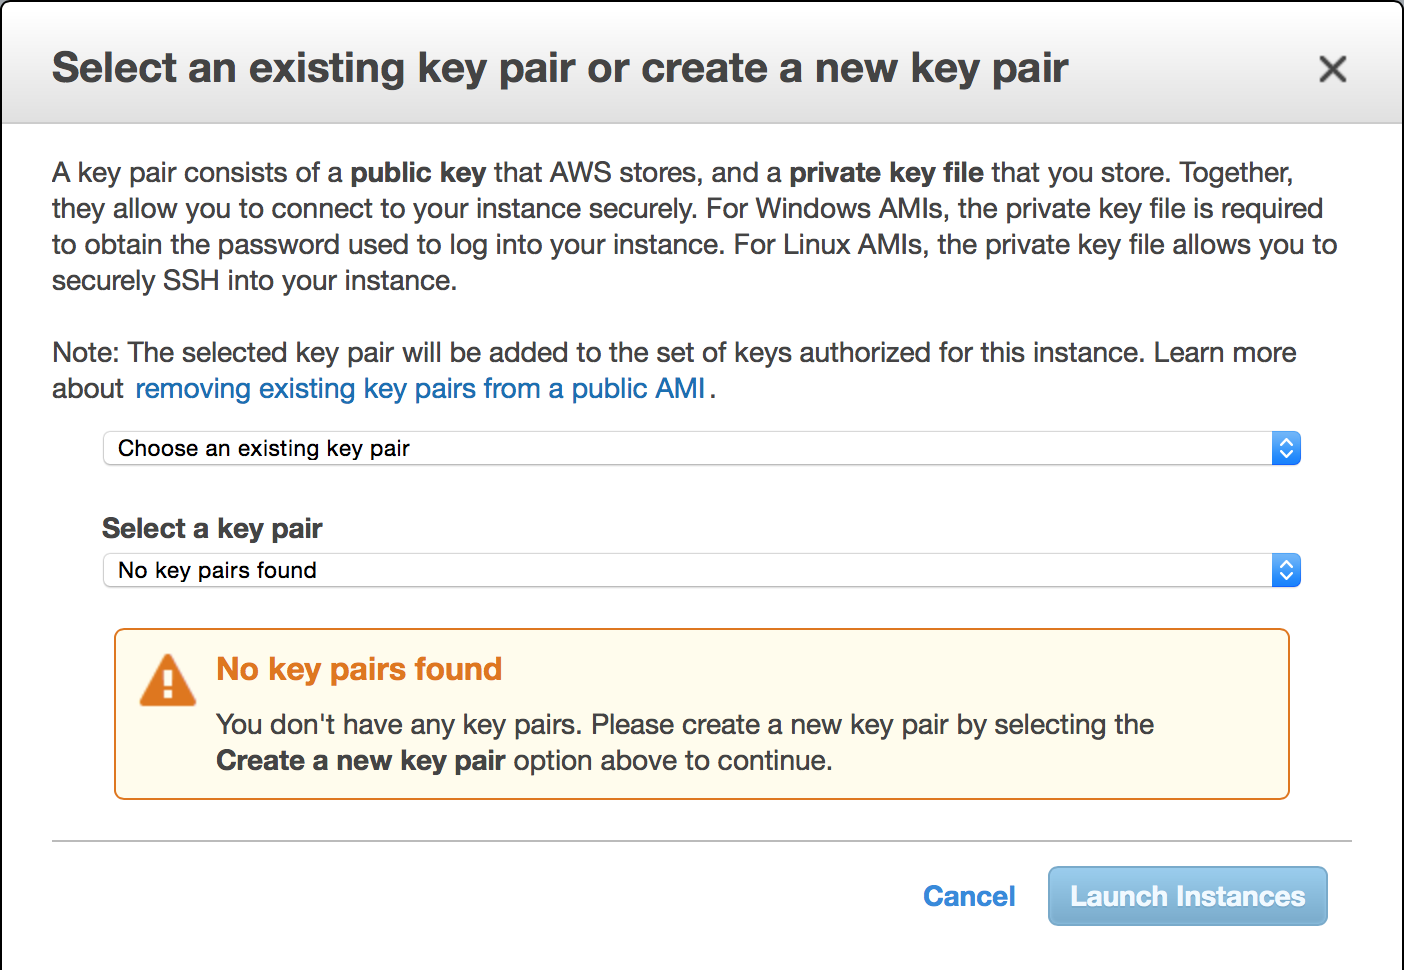
EC2 instances use SSH’s public key authentication by default, instead of the password-based one. This requires us to either generate or import a pair of keys (public and private) that we will use to access our server.
AWS provides a keypair generator that will create a PEM file containing our keys and will store the public key and configure the instance use it for authentication. We can choose this same keypair to be used in any future instances we create.
IMPORTANT: Make sure you keep this PEM file secure since AWS does not store the private key!
After this last step, the instance will be created and deployed. It usually takes a couple minutes to be ready for usage. When it’s done, well be ready to enter our server using the SSH key we have downloaded during the instance creation process.
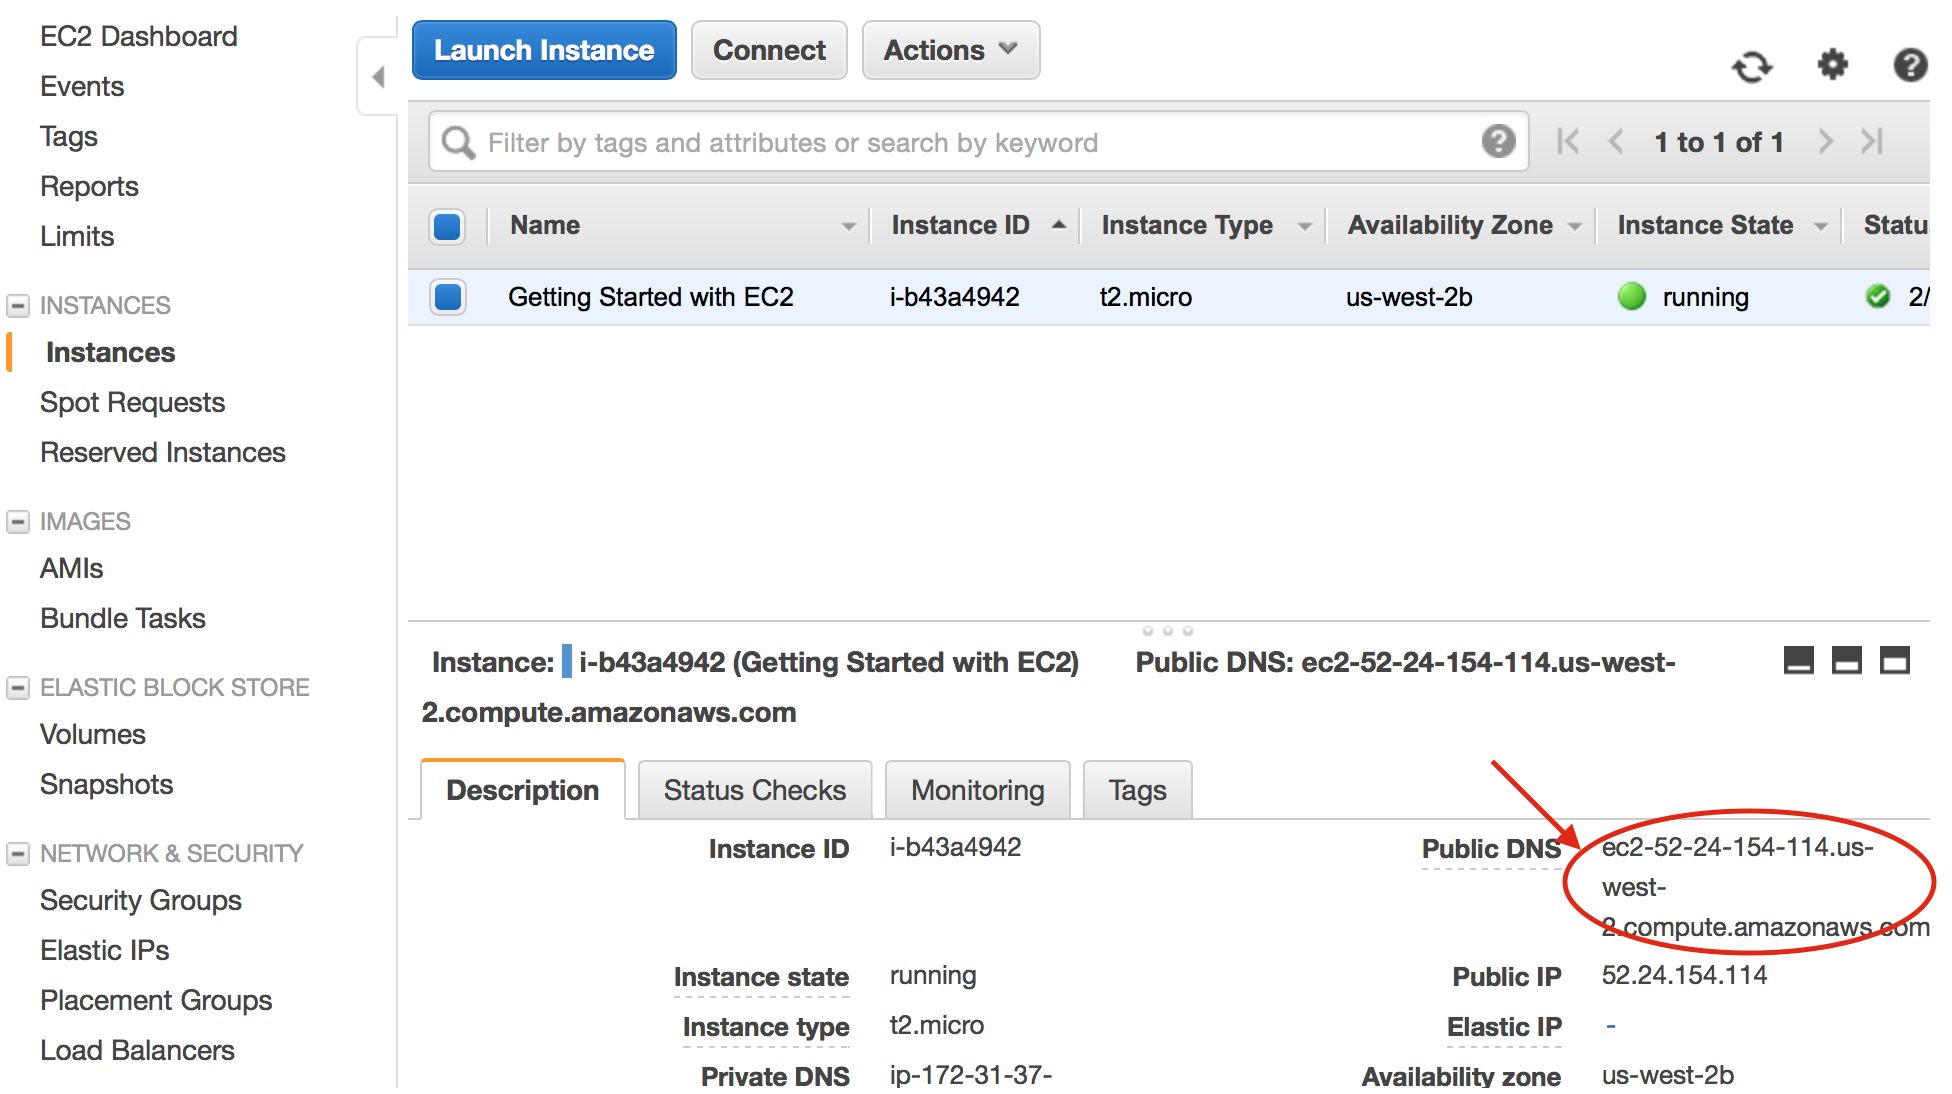
In order to connect to the instance, we need to find the correct IP address or domain name. EC2 assigns a public IP address every time we launch an instance (this means that, if you stop it and resume it, the IP address could change).
Finally, it’s time to connect to our instance through SSH using the domain name or IP address we found and the keypair we downloaded.
NOTE: The default user for the AMI we chose, is called ubuntu
ssh -i ~/Downloads/mykeystore.pem.txt ubuntu@ec2-52-24-154-114.us-west-2.compute.amazonaws.comIf you get a warning about the file permissions for the PEM file, just issue a chmod 600 command and try again:
@@@@@@@@@@@@@@@@@@@@@@@@@@@@@@@@@@@@@@@@@@@@@@@@@@@@@@@@@@@
@         WARNING: UNPROTECTED PRIVATE KEY FILE!          @
@@@@@@@@@@@@@@@@@@@@@@@@@@@@@@@@@@@@@@@@@@@@@@@@@@@@@@@@@@@
Permissions 0644 for '/Users/myuser/Downloads/mykeystore.pem.txt' are too open.
It is required that your private key files are NOT accessible by others.
This private key will be ignored.
bad permissions: ignore key: /Users/myuser/Downloads/mykeystore.pem.txt
Permission denied (publickey).
NOTE: Make sure you use the right path when specifying the location of your PEM file.
chmod 600 /Users/myuser/Downloads/mykeystore.pem.txtNow, just run the SSH command again to connect to the instance and run a few commands to try it out:
ssh -i ~/Downloads/my-keystore.pem.txt ubuntu@ec2-52-24-154-114.us-west-2.compute.amazonaws.com
Welcome to Ubuntu 14.04.2 LTS (GNU/Linux 3.13.0-48-generic x86_64)

ubuntu@ip-172-31-37-140:~$ lsb_release -a
No LSB modules are available.
Distributor ID:	Ubuntu
Description:	Ubuntu 14.04.2 LTS
Release:	14.04
Codename:	trusty
Conclusion
AWS offers many, many services, and EC2 is a great one that allows us to easily launch servers when we need them for a very low initial price. And the Free Tier is a nice way to try it out before you decide to make the jump to cloud services.
Be sure to test it if you haven’t already, and leave any comments or questions below.
Thanks for reading!
Comments